Are you tired of dealing with electrical issues and not knowing where the problem lies? If you’re looking to solve these problems yourself, a continuity tester is a must-have tool.
This simple device helps you determine if there’s a complete electrical path between two points, crucial for troubleshooting circuits and identifying faults.
In this guide, we’ll show you how to make your own continuity tester, saving you time and money. With easy-to-follow steps and common household items, you’ll have a reliable tool in no time.
So, let’s get started.
What is a Continuity Tester?
Before getting straight to how to make a continuity tester, it’s better to first understand what is it.
Well, a continuity tester is a simple device used to determine if there is a complete electrical path between two points. This is crucial for troubleshooting electrical circuits, as it helps identify if a circuit is open (broken) or closed (complete).
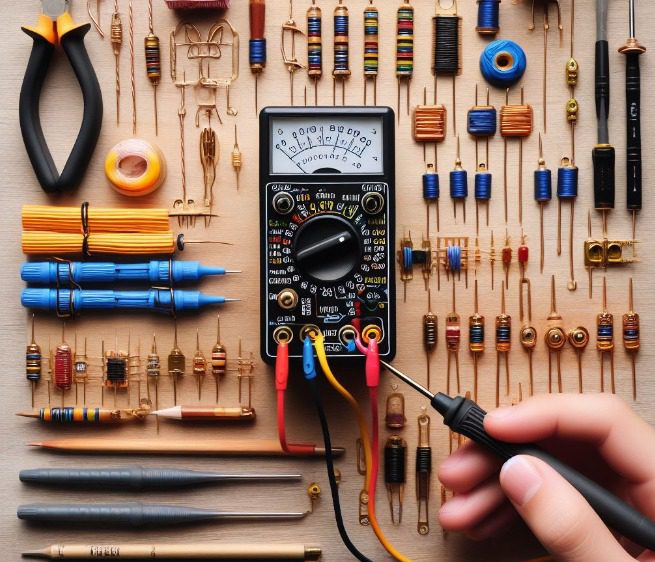
The basic principle behind a continuity tester is quite simple and similar to testing a capacitor with the help of a multimeter. It consists of a battery, a light bulb (or LED), and two probes.
When the probes are touched together, the circuit is complete, and the light bulb or LED lights up, indicating continuity. If there is no continuity (i.e., the circuit is open), the light remains off.
Continuity testers are widely used by electricians, DIY enthusiasts, and hobbyists alike due to their simplicity and effectiveness in identifying electrical faults. They are especially handy when dealing with complex circuits or when troubleshooting electrical appliances.
Now that we have covered the basics of what a continuity tester is, let’s move on to how you can make one yourself using simple household items.
How to Make Continuity Tester? Step-by-Step Guide
Materials Required:
- 1 AAA Battery
- 1 Small Buzzer
- 1 Male-to-male jumper wire (or headers/pins)
- 1 Old thick sketch pen
- 1 Any pen
- Some wire
- Soldering iron
- Hot glue or adhesive
- Wire strippers or scissors
- Solder
- Sandpaper (100 grit)
Here are the steps that will help you create a continuity tester at home:
Note:
Gather all the materials listed above. Ensure the AAA battery is fully charged, and the buzzer is in working condition. If the sketch pen is not thick enough, you can use any other similar cylindrical object.
Step #1: Disassemble the Buzzer
Carefully open the casing of the buzzer using a screwdriver or by prying it open. Inside, you will find a coil and a diaphragm. Remove the diaphragm, as it won’t be needed for this project.
Step #2: Prepare the Pen Casing
Using the sandpaper, sand the outer surface of the thick sketch pen to remove any printed design or coating. This will help the wire adhere to the pen casing.
Step #3: Insert the Battery
Take the AAA battery and insert it into the pen casing. Ensure that the positive (+) and negative (-) terminals are positioned correctly.
Step #4: Connect the Buzzer
Take the male-to-male jumper wire and connect one end to the positive terminal of the battery. Connect the other end to one of the leads of the buzzer coil.
Step #5: Connect the Wire
Take a piece of wire and connect one end to the negative terminal of the battery. Connect the other end to the remaining lead of the buzzer coil.
Step #6: Secure the Connections
Use the soldering iron to solder the connections between the wires, battery, and buzzer. Ensure that the connections are secure and insulated.
Step #7: Test the Continuity Tester
To test the continuity tester circuit, touch the ends of the wire to a conductive material. If the material is conductive, the buzzer should emit a sound, indicating continuity.
Step #8: Assemble the Tester
Once you have confirmed that the continuity tester is working, reassemble the buzzer casing and secure it with hot glue or adhesive. Ensure that the battery is securely placed inside the pen casing.
That’s it. Your homemade continuity tester is now ready to use!
Additional Safety Tips For You
When making a continuity tester, it’s essential to prioritize safety.
Here are some additional safety tips:
- Understand Electrical Basics: Before starting, understand the basics of electricity, including voltage, current, and resistance. This knowledge will help you identify potential hazards and work safely.
- Use Proper Insulation: Ensure that all wires and connections are properly insulated to prevent electric shock and short circuits. Use heat shrink tubing or electrical tape to insulate exposed wires.
- Check for Live Circuits: Always verify that the circuit you are working on is not live. Use a voltage tester or multimeter to check for the presence of voltage before touching any components.
- Work Methodically: Follow a systematic approach when assembling the continuity tester. Double-check each connection before moving on to the next step to avoid mistakes that could lead to safety hazards.
- Use Soldering Iron Safely: If soldering is required, use a soldering iron with a grounded plug and a proper stand. Always solder in a well-ventilated area and avoid touching the hot tip of the iron.
- Educate Yourself Continuously: Stay updated with safety practices and techniques related to electronics and electrical work to ensure you are always working safely.
By following these deeper safety tips, you can minimize the risk of accidents and ensure a safer working environment when making your continuity tester.
FAQs
-
Why would I need a continuity tester?
A continuity tester is useful for checking the integrity of electrical connections, such as wires, fuses, and switches. It can help identify faulty components or wiring issues in electrical circuits.
-
Can I use a multimeter instead of a continuity tester?
Yes, a multimeter can also be used to test continuity. Most multimeters have a continuity tester symbol that emits a beep when a complete circuit is detected.
-
Is it safe to make a continuity tester at home?
Yes, making a continuity tester at home is safe, provided you follow basic safety precautions when working with electrical components, such as wearing insulated gloves and working in a well-ventilated area.
-
What are some common uses of a continuity tester?
A continuity tester can be used to check the continuity of wires, test switches and fuses, locate short circuits, and verify the grounding of electrical devices.
Conclusion
So that’s how you can make a continuity tester at home. Whether you’re a hobbyist or a DIY enthusiast, building your own continuity tester is a great way to learn about electronics and improve your DIY skills.
So, gather your materials, follow the steps, and enjoy the satisfaction of creating something useful with your own hands.